
 I decided to decorate eggs this year! I don’t usually, since it’s just the two of us, and neither of us are huge fans of eating boiled eggs… but this year I found some inspiration from Better Homes and Gardens! I found these adorable eggs decorated with glitter and these instructions, and I just had to try it myself!
Since I was going to all the work of decorating with glitter, I decided to decorate fake eggs, so that I could keep them around! I 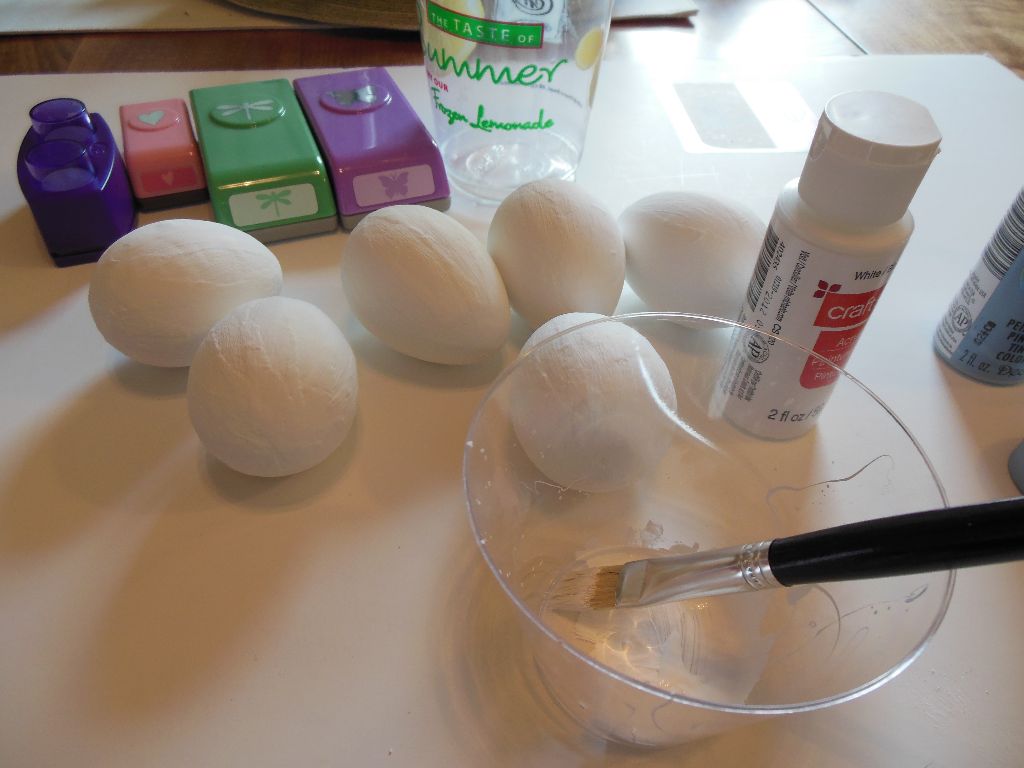 was thinking wooden ones, but I found some paper mache eggs at Michael’s and went with them. Before I could begin decorating my eggs, I had to paint them white.
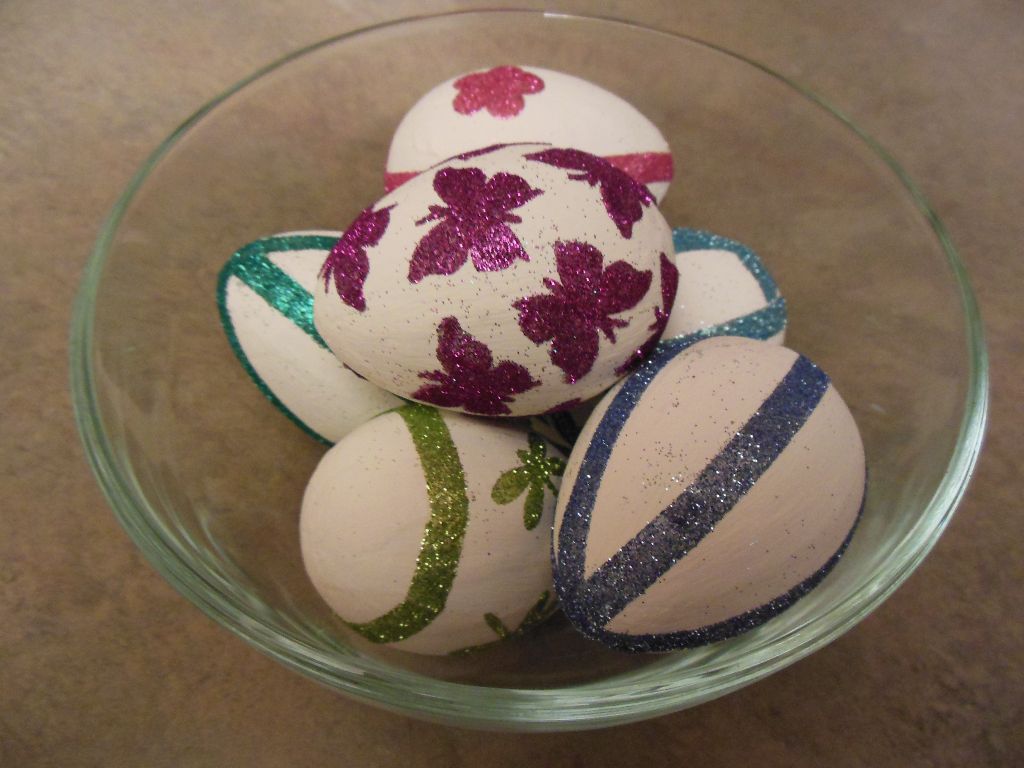
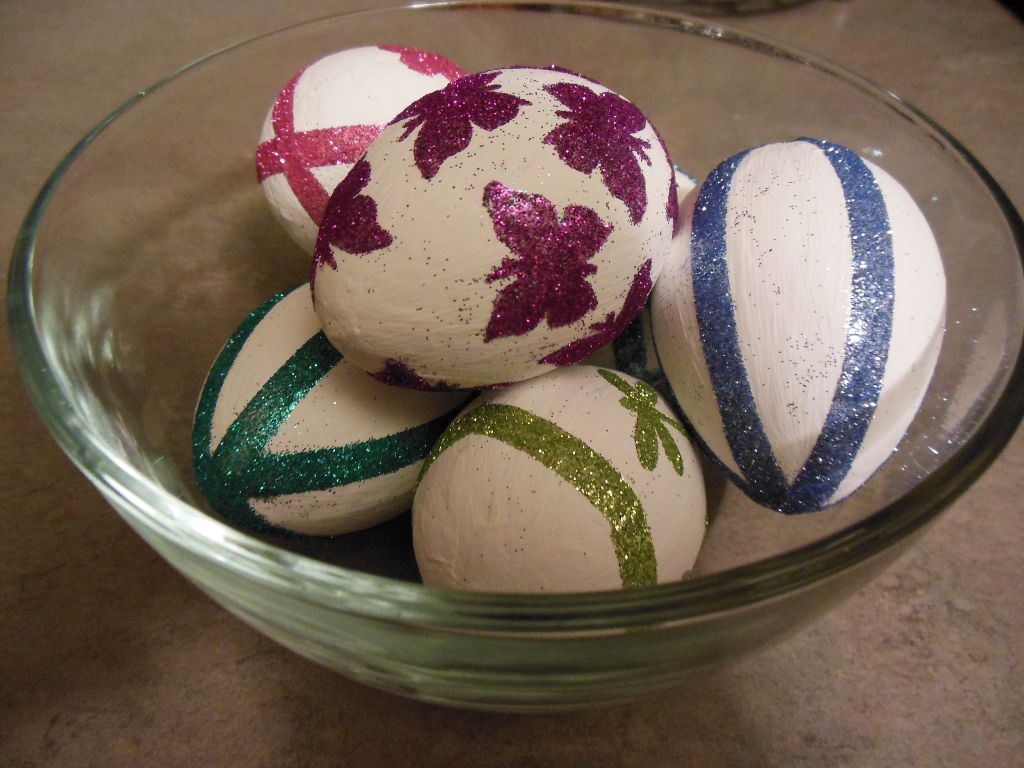
After they were painted, I used my paper punches to punch some shapes out of the double sided adhesive sheets. I found that my paper punches did not like the adhesive sheets. They were too thick. I managed to punch a bunch of butterflies, but only managed 2 flowers 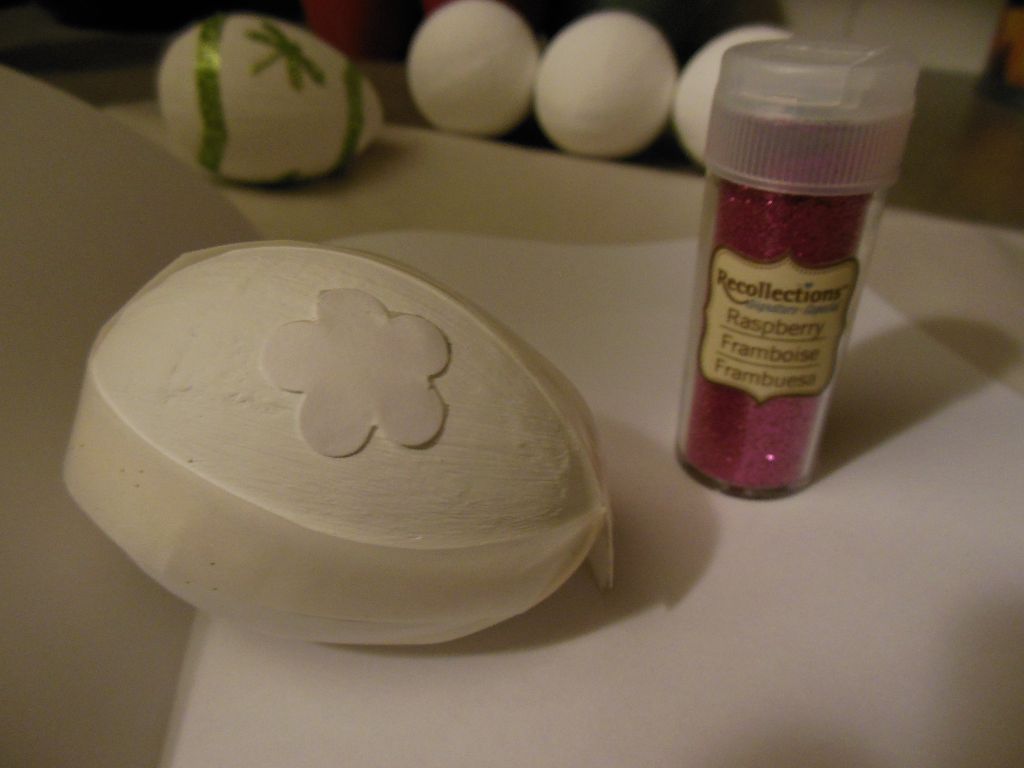 and a few dragonflies. I didn’t want to hurt my punches! BHG must have stronger punches or something… For the rest, I used some double sided scrapbook adhesive (“photo tape” from Creative Memories) to make the lines on the eggs. I could have cut shapes out from the adhesive sheets with scissors, but I was too lazy… Once I had my adhesive on the egg, I removed the second backing piece and then glittered the egg!
In the end, I think they turned out really cute!!